When I got started in off-roading, it began with the first vehicle my parents would let me drive: A Chevy Conversion Van. My parents probably thought there’s no way I could get into any trouble in that thing, but they were wrong for 3 reasons. It had a 350 small block, a limited slip rear differential, and room for about 20 of my friends if we didn’t mind getting a little close. Needless to say, among the other bad ideas I had as a young high school kid, I took that thing off-roading to go camping. Even though I got lucky and never got it stuck, I can guarantee a lot of my friends wish I had padding on the roof.
Well, as I grew up, I had a Ford Ranger, and a few other 4wd vehicles, such as 4runners and other pickups. Once I started building a dedicated off-road vehicle, one of the first things we did is remove the swaybars to allow for more flex in the front and rear. The reason is quite simple, actually. When the OEM manufacturers design a vehicle with 90% of its expected life to be pavement, it makes sense that although the suspensions were capable of full travel, the swaybars were too stiff for everyday off-roading and more for controlling body roll in turns at highway speeds. So, needless to say, we removed them and all of a sudden the suspension felt more plush, we lifted less tires, and allowed for more forward momentum because our tires were on the ground more.
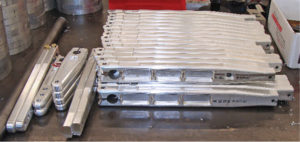
Well, time passes, technology changes, and today even the highest dollar competition rock buggies with way more travel than I ever had have and utilize swaybars to control their suspensions. In fact, their swaybars are an integral part of the whole design of their suspensions. So, since we’re not really talking about rock crawling, necessarily, and more how swaybars enhance a vehicle’s performance, let’s direct this to our industry: UTVs.
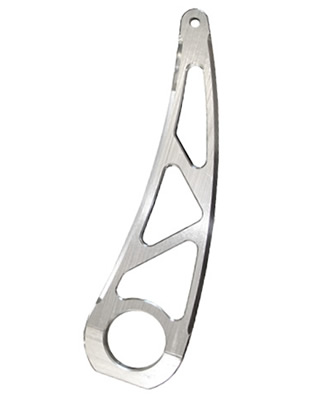
Most manufacturers are including swaybars at a minimum in the rear and some have them both front and rear. So, why do we need them on UTVs, you ask? What are the advantages? What are the disadvantages? Well, before we get into the various characteristics of sway bars, I had a chance to meet up with Frank at ITI Performance in CA. We met Frank through Mafia Industries, which had been running their new swaybars on the backs of their race RZRs for quite some time with great results. In fact, Troy and I had a chance to drive Chad Mittag’s race RZR out at the Glamis Dunes and by far it was the best handling UTV I’ve ever driven. Now, this was their full blown racing vehicle, so it was far from stock, but one of the things I noticed then is that it had this highly polished fancy looking rear sway bar. So, time passed and I finally met Frank at a show in CA to see what all he had in store for us UTV enthusiasts.
So, we went to see their facility where all this stuff was made to find out exactly what goes into designing a properly designed sway bar for a UTV. ITI Performance has been designing sway bars for years in the circle track arena. One of the first things out of Frank’s mouth was that in circle track, you have to be able to turn, and that’s what sway bars allow us to do: turn where you want it to turn. So, this same science applies to automobiles, UTVs, ATVs, basically any vehicle with 4 tires working to some degree independently of each other. We were due a lesson on sway bars, although I had some preconceived notions about what they did. So, here’s a quick example of what happens when driving your vehicle. Let’s say you’re going 40 mph and you begin to turn your UTV to the right. This automatically shifts weight to your outside wheels/tires, causing the suspension to compress. Without sway bars at all, the full force of the UTV is transferred to the left side of the vehicle and induces body roll to the point that the shock’s springs match the force of the body leaning in the turn. If you’ve never done it, take your sway bar(s) off and go for a quick ride, and you’ll immediately notice a lot more body roll and will probably make you feel like you’re going to tip over. Well, just trust me if you don’t want to go through the time to test it. To further explain this, if in that same exact situation, you had a sway bar on the UTV, as that outside tire compresses, the sway bar is forced to twist against the other side of the vehicle making that opposite side also compress. So, in a nutshell, and only to a point, it helps to keep the vehicle more level. The reason I say to a point is that the upward force exhibited on the opposing (light) side of the vehicle can only help to bring the vehicle down to a point. And, at that point it’s overcome by too much force to the outside of the turn and over you go. Ever experienced that one before? Fun, huh! Well, this is just to point out that sway bars are not the cure for insane or careless driving.
So, sway bars essentially use the force of the vehicle that’s exhibited on one side or the other to its advantage to keep the UTV more level/stable when turning. So you’re probably thinking, well where can I get me one of those sway bars? Well, it’s not that easy, really. Yeah, you could probably use a sway bar off a jeep if it was the right width, but because of the inherent weight difference between the vehicles, differences in roll centers and center of gravity, you would turn your UTV into riding on rails with no suspension. It goes both ways: you can go with too stiff of a sway bar or too soft of a sway bar. Too stiff and your suspension won’t flex independently of each other over varying terrain. Too soft and your suspension won’t achieve the desired goal of keeping the car more level when turning. The bigger the diameter of the bar, the stiffer it is, and vice versa. You can make them out of hollow tube or solid tube, but for durability purposes on a UTV, ITI Performance makes them out of the correct diameter solid tube. A lot of the stock OEM models come with hollow tube sway bars, but over time these tend to break at the bushing locations on the bar because of all the force that’s transmitted there.
So, what does all this mean? Well, it all depends on what type of riding you do and what your expectations are with adding a front or rear or both sway bars on your UTV. To give you a good example, the stock Polaris RZR comes with a front and rear sway bar, but for my driving style, I immediately remove the front one. The RZR has so much power and weight transfer to the rear, that I find the front sway bar to be excessive and limits wheel travel except for at the highest impacts. Yes, it leans a tad more, but the rear sway bar is almost enough to do what I want it to in most conditions. But, the stock sway bars are very limiting with what you can do with them.
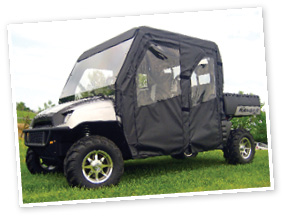
To get a first-hand experience for ourselves, we left a Ranger XP with ITI Performance to mock up the ideal rear sway bar for it. Up until this point, and for the purposes of this Ranger’s life, it had seen a ton of slow speed rock crawling. I had removed the rear sway bar to allow for maximum flex/articulation at slow speeds. This worked fine for the rock crawling, but it was scary as could be at high speed cornering because it literally felt like it was going to roll over. It had so much body roll to it, that anyone riding in it for the first time thought they were going to die at any moment. Plus, it had a 2” lift and at times 29” tires, so the body roll was considerably more than when it was stock height. Needless to say, I was very interested to see what kind of magic ITI could come up with on this beast.
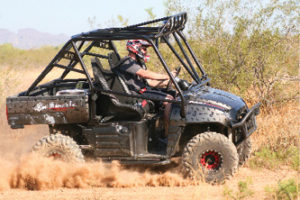
Well, I think the pictures speak louder than words, but the result was an astounding difference was made with the addition of ITI’s rear sway bar. It still felt very plush, corners way better than without the sway bar, and yet it has very little body roll. In the end, they matched the rear sway bar perfectly to the UTV’s weight and shock setup. I was able to flick the Ranger around almost like I was driving my race RZR…okay, maybe not quite that good, but much better than before. It literally would allow me to tap the brakes entering into a corner and get it to induce a slide in the rear just like it should handle. Before, without the rear sway bar in place, do that same technique and I’d be asking for trouble. Overall, I’m very impressed with the build quality and level of experience that ITI brings to the table when designing their sway bar kits. So, if you own a Yamaha Rhino, Polaris RZR or Ranger, Arctic Cat Prowler, or Kawasaki Teryx and want to milk every last ounce of performance out of your ride, I’d highly recommend giving Frank a call at ITI to see what they can do for you. And, if you’re wondering if they make kits for long travel, they sure do.
