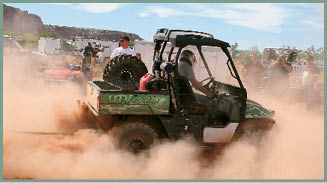
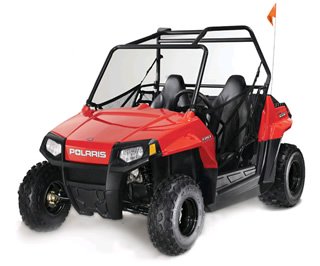
Well, it’s come time to complete the Ranger XP Buildup, so we’re going to highlight the products we used to make this one of the fastest and most capable Polaris Rangers around.
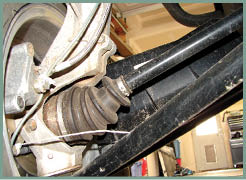
To start, one of the vulnerable areas of any independent suspension UTV are the axles and CVs. To withstand the extra power and larger tires/wheels that we’re using, we decided to use Gorilla axles. Gorilla Axle has made a great name for themselves in the ATV/UTV industry over the years as a nearly indestructible axle capable of much higher stresses than stock. Because of their reputation, we had little to no worry they’d handle the loads we were going to put on them. And, after hundreds of miles of everything from high-speed desert riding to slow-speed rock crawling, they’ve held up flawlessly. Gorilla axles aren’t cheap, but if you’re breaking axles or CVs on a regular basis, it only takes one replacement to be wasting your money on the factory models. Plus, Gorilla provides a 1-year warranty, which will include a free replacement/repair if needed for any reason. Now that’s peace of mind!
From here, another area of vulnerability on a UTV is the undercarriage. The Rangers are no exception with rather weak plastic skid plates that don’t fully cover the undercarriage, let alone the gas tank. When we searched for the ultimate set of skid plates for our Ranger, we wanted 3/16” aluminum and as much coverage as possible. After searching the various options available to us, we decided on Hype Manufacturing’s full set of skids. Not only do they cover the center portion of the frame, they come completely out to the edge of the body as well, which makes for a completely covered undercarriage capable of withstanding pretty much any level of punishment you can dish out. And, that’s exactly what we’ve the Ranger when rock crawling. Plus, they double as a nice side step for getting in and out of the Ranger. And, the nice thing is the rock sliders work in unison with their side skid plates without modification. And, before I forget, we added Hype’s leg minders to help prevent us from throwing our legs out while riding in rough conditions. Not only do they look great, but they also hold up to some serious abuse. We’ve had large boulders pushed right into them, and the nice thing is it keeps the rocks from being pushed far into the cab, hanging you up, potentially.
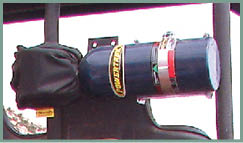
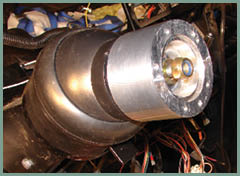
One of the unfortunate things that can happen out on the trail is a flat tire, or, even worse, a blown bead. In either case, you’ll need an air source capable of pumping up the tire and re-seating a bead. So, after reviewing the various options, from small air compressors with tanks to CO2 cartridges to scuba-tank-looking CO2 tanks, we decided that the best made option is the one provided by Powertank. Powertank has been making high-end CO2 filled tanks for the truck/motorsports industry for years, and now they have some nice smaller models that can easily be carried in the bed of your UTV, and even your storage compartments if you opt for their smallest one. In our case, I wanted enough air to handle the large 29.5” tires. 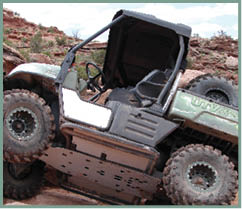 In addition, if you’ve never had to re-seat a bead on your tires, it requires a rather large amount of air volume. With the adjustable dial on the top of the Powertank, you can make the pressure from low to really high, high enough to run even the largest of air tools. In our case, we mounted the tank using their universal roll cage mounting kit. We mounted it directly behind the passenger horizontally, which so far has held up perfectly. To pump up the tires, we grab the mesh bag with the assortment of connections and can either remove the tank or leave it in the mounted location to pump up all 4 tires. The other advantage to this type of setup is that I can use it on my motorhome, when I’m off-roading in my 4-Runner, and if I take a long road trip I take it with me in my Tundra for extra security. It’s small and light enough to fit almost anywhere you need to mount it and definitely not too heavy to haul in your UTV.
If you haven’t already noticed, the Ranger has had a nice graphics kit on it from nearly the beginning of the buildup. When searching for options to make our Ranger look unique, we turned to Invision Artworks (aka Side x Side Graphics). They have a bunch of different designs not only for the Ranger, but also for  most UTVs. All we had to do is select a design we liked, and they sent us the pre-cut kit in a tube. Once you pull it all out, it’s really easy to install, and it’s more durable than paint. And, did I mention it’s about a ¼ of the cost, as well? To install the graphics, it’s really just a matter of time that you’ll have a fully wrapped UTV that looks way better than stock. Just be careful to apply them slowly and try to keep the bubbles to a minimum. Once fully applied, we left it out in the sunlight for a day, and virtually all the bubbles were gone and it looked great. The only thing we changed on our kit was we cut the front hood graphics in half to make the application a little easier. Once applied though, you can’t even tell it’s in two sections. So, if you’re looking for a great looking graphics kit for your UTV, I’d highly recommend considering Side x Side Graphics to save yourself on average $1,500 over a paint job.
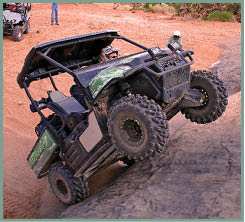
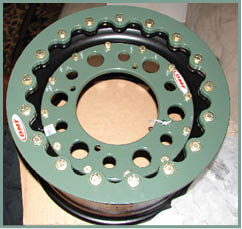
The first things folks change on their UTV is tires and wheels. We turned to one of the best companies in the industry, OMF Performance, to see what they recommended to not only make our Ranger look great, but function flawlessly, as well. They recommended that we try their new Billet Center Beadlock Wheels, because they looked like nothing on the market and were very strong to handle the increased loads of our 29.5” Interco Swamplites. When installing beadlock wheels, it’s important that you center the tire on the wheel as much as possible. The best way to do this is tighten the beadlock ring at opposite sides a little at a time. This spreads the pressure on the tire evenly, which is important to having no leaks and a decently balanced tire/wheel combo. Outside of that, everything about a beadlock wheel is fairly self explanatory, and actually easier to dismount because you only have one bead to pop when removing the tire. And, when mounting these wheels, do not use the tapered lug nuts that you might have already. You’ll notice the OMF Billet Center Beadlocks require their included flat nuts to hold the wheel on. Lastly, I decided to install the longer wheel studs on the front hubs because of the thick aluminum center piece on the wheels. It probably wasn’t needed, but that little extra security makes me more comfortable when driving at high speeds. Overall, we’ve put our OMF wheels through their paces, including some extreme rock crawling and high-speed desert riding. They have their typical rock rash, but outside of that, they are as straight as when we got them.
If you haven’t had a chance to review the other issues of this buildup, we’ve been testing the Ranger’s performance after each modification has been performed. One of the best ways to do this is by using a Veypor VR2, which is a very cool gadget that helps monitor RPMs, speed, odometer, acceleration, dynamometer information, lap times, timed acceleration, and many other functions to help measure performance increases by each modification. It wouldn’t have been possible to measure all the gains of our modifications without this tool. Plus, under normal driving conditions, it’s handy on the 2005 Rangers to have a tachometer, speedometer, and odometer when it doesn’t come with it from the factory. The install process is rather simple, and switching between modes is very easy to do. It comes with a RAM mount, which we mounted on the steering wheel shaft resulting in good visibility from the driver’s seat. These units are designed specifically for motorsports applications, so vibration and weather does not affect them.
Next, one of the most complained about things about the Ranger is the bench seat with tractor-style steering wheel ergonomics. To fix this, we decided to install Pro Precision’s tilt steering column. Talk about changing the whole feel of the Ranger…Wow! It’s amazing what a big difference a tilt wheel makes to overall comfort, that’s for sure. To install the tilt steering wheel, all you need are basic hand tools. It’s a simple install process and took us roughly 3-4 hours to complete. It’s not a cheap item, but the difference it makes to overall comfort in a Ranger is well worth the investment. Plus, it looks really cool, as well.
So, to address the stock bench seat, we installed a PRP bench seat, which is a suspension style seat that provides more support, better looks, and places for safety harnesses, as well. We chose a black/grey combo in vinyl for durability, and so far are very impressed with how it’s holding up to our abuse. This combined with the tilt steering column from Pro Precision made a world of difference to the Ranger.

Last, but not least, some of the most important items for folks are shiny billet that serve no function at all, just looks. I’m not a big fan personally, but apparently I’m a minority in this regard. So, to show folks some options for the Ranger, we opted to use Hype Manufacturing’s full line of billet accessories to spruce up the appearance of our Ranger. These ranged from cup holders, billet dash enhancements, gear shifter, engine cover, and glove box cover. I have to admit that it’s almost converted me to like to add billet accessories, which is a big deal for me. And, the nice thing about Hype is that you can get the finish in clear anodized, polished, or untreated brushed, so the options are endless to suit your specific needs.
Overall, we’re very impressed with the performance, looks, comfort, and function of the Ranger. The nice thing is that hopefully you can pick and choose what items you liked best and build your ultimate Ranger XP, as well.
Review By: UTV Off-Road Magazine
